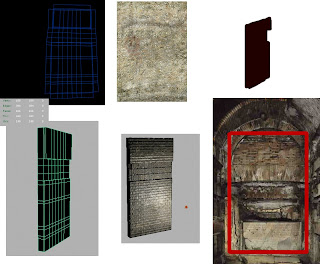
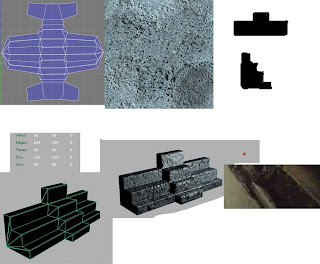
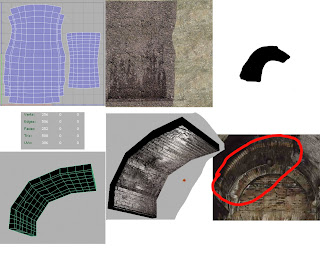
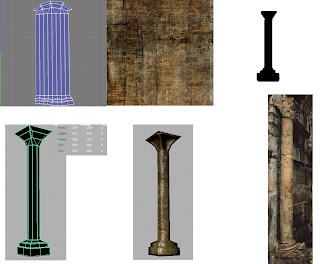
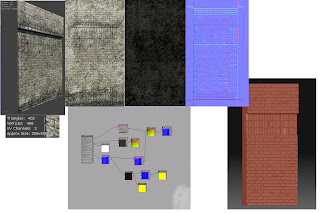
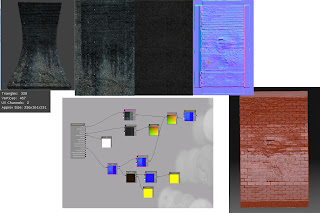
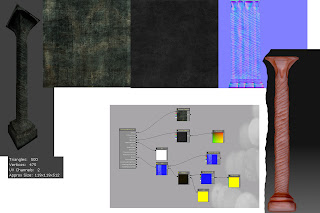
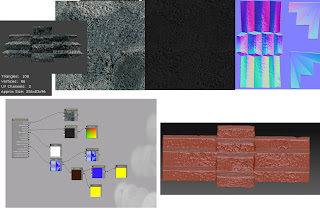
Other than an inappropriate acronym for this class, it's at least an accurate description for the course that used to be titled Level DEsign. Since you don't really design anything, you're just plugging in static meshes you've built as a part of an assembly line ... but I think I'm getting ahead of myself.
This is the month everyone in game art is told: "you have to chose to pass one class or the other, it's nearly impossible to pass them both." They were right, I spent most of my time generating assets for this class ... for our level ... a lot of which never got used. Still, I kept on keeping on, that's what makes this month a killer: a lot of people see that it's hard and stop trying.
Every lab was a turn in for something, so every day blurred lines with every other day. Here's my dailies:
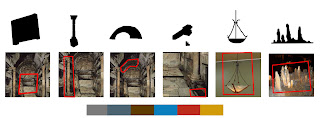
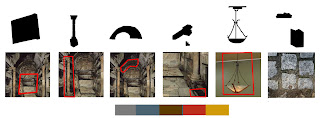
First we tell them what color scheme and what static meshes we plan on using
During the instructor's critique I was told that caves don't have stalagmites ... so ... yeah ... whatever. I changed them out for cobblestone ... things.
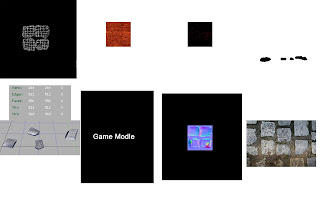
So we had to have the ground breakup and the light source modeled, textured, and inside UDK by the end of the next lab ... and yes I know how to spell "model" but whoever made our templates didn't. ;)
Next turn-in was the beginning of our structural pieces to begin blocking out the level....
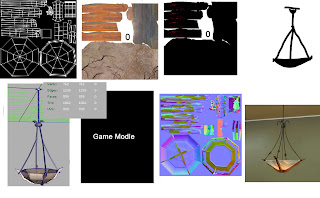
Coming up on the home stretch of the month we were required to submit another set of dailies for our structural pieces, here's where I found out I was ahead because I already had the zbrush sculpts done for the first structure turn-in. Oops? The major update on these is that they're more refined than the initial turn-in. Cleaner uv's gave me cleaner texture maps ... it also helped I was able to give them a detailed normal map through UDK.
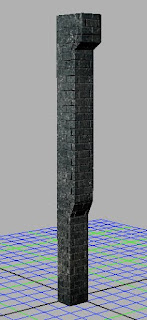
As we went along we found the need to cover up some seams, so I made this pillar and it actually turned out pretty good for corners too. There was other pieces I made that weren't used at all, so I'm only showing this one.
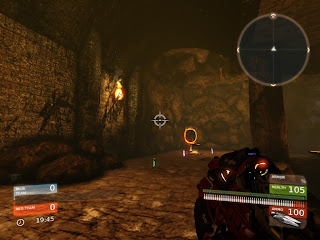
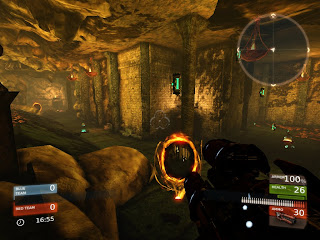
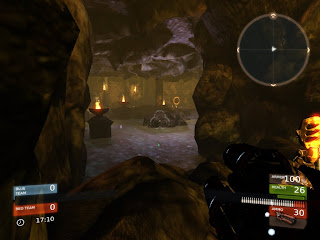
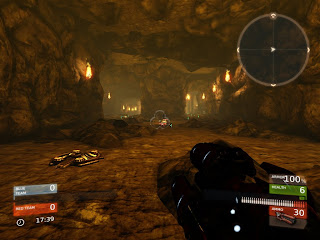
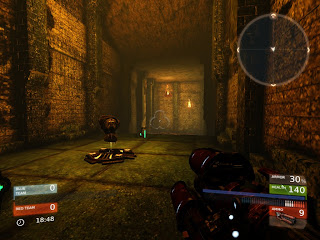
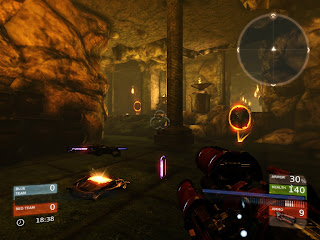
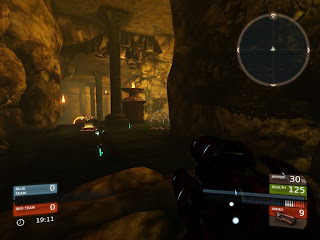
Some shots taken from the level:
A blog of my time spent at Full Sail University, the 3d art work I learned to create there, and what I've been making since then.
28 August 2010
Texture Painting and Sculpting [Month 13]
This class by itself was fairly easy, what was hard was that we weren't really given any time to work on our final during lab but we did get a lot of practice texturing things with photoshop.
The first thing that was due, was due at the end of the first day: pre-pro for our final and several reference images for the final. Getting approval for a small archway, I set to painting one out in photoshop.
After the painting, I went home and worked on a rough block-out in maya that I would sculpt on in zbrush. Getting the sculpting, the bricks laid out, all of it decimated and then imported back into maya was all I got done on the "weekend"(sunday) on the first week. After this I abandoned the project in favor for our other class this month, which actually sucked up all my time until the final week of the month.
So for the first 20 minutes of every lab we practiced with speed paintings ... anything we wanted as long as it looked good by the end of the 20 minutes. Sometimes I did decent, other times I down right sucked ... but all in all I got lots of photoshop practice this month. This was practice for a diffuse on a mailbox.
Once the speed paintings are done it's time to texture something, so out of a treasure chest and a mailbox I decided the treasure chest was much more interesting.
For the next lab I decided to speed paint/practice a repeating cement-like repeating texture.
Then during the lab I decided I would try to texture the stylized mailbox ... I didn't really have a lot of luck with this one.
Some days we didn't get the chance to do a speed painting, and on those days we did a lot of other extra things to make up for the lack of it. Today I tried a stylized treasure chest, with it we had to produce a lot of extra maps for turn-in.
Diffuse:
Height:
Specular:
Final Product:
During the weekend of the second week, I took time away from my level design class to make some texture maps for my arch so I could get a proper critique in class ... after looking at this for 2 seconds I was told over the course of many many paragraphs that I should start over. A class I already dislike just got worse, when would I have time to work on it?
During the speed painting for that lab I was pretty bummed out from being told to start over, and when that happens I get pretty empty on fresh ideas. So I just tried another tiling texture ... that I didn't quite finish. Not really sure what I was going for on this piece, but I thought it turned out interesting.
For the actual assignment for the lab, we were told to create a tiling texture from inside zbrush ... I don't see why you would ever want to do that, but "... do what Jeff says" became the lab anthem. For this we simply tiled around a brick or whatever we could create, and then apply different zbrush materials to the document.
First tiling texture make a normal map:
Next create a height map:
Then make a specular map:
Lastly, a cavity map:
Just don't ask me what a cavity map is other than to maybe help a normal map along in photoshop or something.
It's almost the end of the month and I haven't gotten anything done on my final project yet, how about we spend more time doing unrelated stuff? So in today's lab we got to try out polypainting in zbrush ... maybe if I understood what was going on a little better I wouldn't be afraid to try it, but for now I'll just stick to the lab assignments.
Yes, it's the same brick ... but I'm a little soft on my color vision so I just threw some colors down I color picked from a photo of bricks I opened in photoshop. So apparently this is what zbrush sees as it's default uv layout? Zbrush is an idiot! :p
Once you convince zbrush to layout a little better and flip itself vertically, you can then export some maps from it!
Diffuse:
Specular map:
Height map:
Final lab, they let us work on our final projects ... so I started working on it and hoped I could finish it in time. I managed to scavenge the base wall from an early save, and then I found the bricks layed out in maya and was able to delete the one's I was told to get rid of and move around some of the others so I could get some interesting silhouette changes. Then I pieced them together and sculpted on them in zbrush ... of course lab ended and I had to take the work home. So from there I got stuck, the 12 million poly wall wouldn't open in any program without trying to melt the computer ... at least until I changed the export settings to export the wall at a scale of .001. From there I could set up the normal map, and get a layout for the texture so I could trace out some grout lines and start adding some muck and dirt layers to the diffuse. After that I turned it in when I went to the last level design class for the month, and hoped for the best.
I made the required changes to the wireframe of the mid-res:
Sculpted it all up in zbrush:Made some normal maps ... yes plural .. I had to piece together the best parts of each of the normal maps that actually worked. I don't know why this simple little wall gave me such a hard time!
I used the uv layout snapshot and the normal map together in photoshop to help me paint the diffuse:
From the diffuse, I simplified the layers and played with the levels to get my specular map:
From here it was exported as an .fbx and imported into UDK ... you'd think I got a screen shot of that right? As soon as I get one I'll be posting it here. ;)
[update: 5oct2010]: I managed to acquire a screen shot of my focal object in UDK before I left our lab today, so here it is as promised.
The first thing that was due, was due at the end of the first day: pre-pro for our final and several reference images for the final. Getting approval for a small archway, I set to painting one out in photoshop.
After the painting, I went home and worked on a rough block-out in maya that I would sculpt on in zbrush. Getting the sculpting, the bricks laid out, all of it decimated and then imported back into maya was all I got done on the "weekend"(sunday) on the first week. After this I abandoned the project in favor for our other class this month, which actually sucked up all my time until the final week of the month.
So for the first 20 minutes of every lab we practiced with speed paintings ... anything we wanted as long as it looked good by the end of the 20 minutes. Sometimes I did decent, other times I down right sucked ... but all in all I got lots of photoshop practice this month. This was practice for a diffuse on a mailbox.
Once the speed paintings are done it's time to texture something, so out of a treasure chest and a mailbox I decided the treasure chest was much more interesting.
For the next lab I decided to speed paint/practice a repeating cement-like repeating texture.
Then during the lab I decided I would try to texture the stylized mailbox ... I didn't really have a lot of luck with this one.
Some days we didn't get the chance to do a speed painting, and on those days we did a lot of other extra things to make up for the lack of it. Today I tried a stylized treasure chest, with it we had to produce a lot of extra maps for turn-in.
Diffuse:
Height:
Specular:
Final Product:
During the weekend of the second week, I took time away from my level design class to make some texture maps for my arch so I could get a proper critique in class ... after looking at this for 2 seconds I was told over the course of many many paragraphs that I should start over. A class I already dislike just got worse, when would I have time to work on it?
During the speed painting for that lab I was pretty bummed out from being told to start over, and when that happens I get pretty empty on fresh ideas. So I just tried another tiling texture ... that I didn't quite finish. Not really sure what I was going for on this piece, but I thought it turned out interesting.
For the actual assignment for the lab, we were told to create a tiling texture from inside zbrush ... I don't see why you would ever want to do that, but "... do what Jeff says" became the lab anthem. For this we simply tiled around a brick or whatever we could create, and then apply different zbrush materials to the document.
First tiling texture make a normal map:
Next create a height map:
Then make a specular map:
Lastly, a cavity map:
Just don't ask me what a cavity map is other than to maybe help a normal map along in photoshop or something.
It's almost the end of the month and I haven't gotten anything done on my final project yet, how about we spend more time doing unrelated stuff? So in today's lab we got to try out polypainting in zbrush ... maybe if I understood what was going on a little better I wouldn't be afraid to try it, but for now I'll just stick to the lab assignments.
Yes, it's the same brick ... but I'm a little soft on my color vision so I just threw some colors down I color picked from a photo of bricks I opened in photoshop. So apparently this is what zbrush sees as it's default uv layout? Zbrush is an idiot! :p
Once you convince zbrush to layout a little better and flip itself vertically, you can then export some maps from it!
Diffuse:
Specular map:
Height map:
Final lab, they let us work on our final projects ... so I started working on it and hoped I could finish it in time. I managed to scavenge the base wall from an early save, and then I found the bricks layed out in maya and was able to delete the one's I was told to get rid of and move around some of the others so I could get some interesting silhouette changes. Then I pieced them together and sculpted on them in zbrush ... of course lab ended and I had to take the work home. So from there I got stuck, the 12 million poly wall wouldn't open in any program without trying to melt the computer ... at least until I changed the export settings to export the wall at a scale of .001. From there I could set up the normal map, and get a layout for the texture so I could trace out some grout lines and start adding some muck and dirt layers to the diffuse. After that I turned it in when I went to the last level design class for the month, and hoped for the best.
I made the required changes to the wireframe of the mid-res:
Sculpted it all up in zbrush:Made some normal maps ... yes plural .. I had to piece together the best parts of each of the normal maps that actually worked. I don't know why this simple little wall gave me such a hard time!
I used the uv layout snapshot and the normal map together in photoshop to help me paint the diffuse:
From the diffuse, I simplified the layers and played with the levels to get my specular map:
From here it was exported as an .fbx and imported into UDK ... you'd think I got a screen shot of that right? As soon as I get one I'll be posting it here. ;)
[update: 5oct2010]: I managed to acquire a screen shot of my focal object in UDK before I left our lab today, so here it is as promised.
Subscribe to:
Posts (Atom)