After 250 something applications, the only company to actually want me was Allied Barton. Good thing I was able to refile for my D-License without having to take the whole class all over again. So while the job thing was getting started up I was able to find time for a weekend project. Yes, just one, but I'm happy to be able to do this stuff at all.
I had been playing a little bit of a beta test on the PS3, and that's where I got the idea for the weekend project. To make a sort of simple object over the course of several hours just to keep it plausible to work on what I love in the free time I have. The object was a small barrel of energy, so I took a few screen shots and began playing in Maya. All things considered I spent about 12 hours on this piece with all the distractions of the internet and my cell phone at home. Without those distractions I don't know how much time I would have spent on it. Here's how it turned out, and good luck guessing what game inspired me to build this.
I actually had a lot of fun with this barrel, and ended up adding it to my "top secret" project which I'll show details on if I get time to work on it. It's a rather large project so I doubt I'll be able to get very far with it. One thing at a time though right?
November is my final attempt to get a job in the video game industry, so I was pretty excited when I received a phone interview and then a request for an art test. I was pretty nervous as I had never really used 3ds Max before, but everyone says "it's just like maya" .. and they're wrong. I won't go into who the art test was for or show the screenshot I was supposed to make my environment look like, to protect the company, instead I'll just tell you the rest of the details.
Art Test:
In 3ds Max, make an environment with less than 3500 triangles with diffuse and specular textures of 512x512 or below. The environment should be at night with a full moon, it should have 1 cargo ship, 2 cranes, cargo containers, and a warehouse. Optional was rain effects, but I figured I would be happy with just being able to UV and texture for 3ds max. :p
To save time I started in maya, I figured I would make less mistakes in a program I knew pretty well. So after a lot of work in modeling and then saving triangles everywhere that I could manage, it came down to this.
Then I textured everything.
Then I took it all to windows, and hoped I had everything I needed .. which of course I didn't. :p I hate it that I can't just use the mac side for everything. Eventually I figured out how to light and make materials in 3ds max, and I learned that making a secondary uv set for lighting and having shadows bake to that uv set is actually a lot easier than in maya ... but viewing that baked lighting was somewhat more difficult since a lot of color is lost. Too bad 3ds max doesn't have an unlit mode like maya. Anyways, here's what I ended up with for my final render.
They also wanted a video to go along with the final render, so I rendered out a video and found that while the scene was pretty simple and all the lights were baked .. it took max a lot longer to render than maya ever would with this scene. Or maybe it's just because it was my first time building with 3ds max. :) Here's the video I ended up with.
Total build and render time in this new [to me] program was one week, I turned it all in and was promptly told the canned email response that I'd lost out on the job of a lifetime. I think for my skill level in this program I did some amazing work, but I can fully understand them going with a more experienced environment artist in 3ds max.
It's been five months since I graduated and I've applied to 199 positions which came out to three interviews and 1 art test. All of that with no luck, it's time to go get re-certified for my security d and g licenses. I humbly admit my defeat, but I will continue to battle my school to get my diploma which they are still holding for ransom.
Four months after graduation from Full Sail University and 165 applications across the U.S. later, and I'm still unemployed. To keep my mind from closing in on itself I took the advice of a friend and entered the "World of Level Design '10-Year-Old Brother Game Environment Challenge'". Here were the rules/timeline:
----------------------
THE CHALLENGE:
Design and create a game environment built around the theme suggested by Robert's ten-year-old brother: an underwater city that contains a "gigantic battle tower" where warriors would go to face challenges on each floor of the tower and be crowned supreme when they defeated the "boss" challenge at the top.
THEME:
Underwater City
GAME/LEVEL EDITOR:
Any game level editor or 3d software. Some suggestions are:
Build the mentioned game environment for any engine/game. It doesn't have to be "playable" in the sense of having AI or scripted parts. Visuals and layout will be key.
22 days or less to start and complete the challenge.
Use custom assets and/or game's built-in assets.
Must fit within the ESRB's E-10+ guidelines. (See here for details: ESRB ratings guide)
--------------------
I ended up starting 2 days late, but hit the ground running as Full Sail had demanded of me. Here is a weekly update of my daily WIP thread on their forums including a theme page based on ideas they had gotten from the "10 year old brother".
My References:
Week 1:
I started in maya modeling and designing how it would all fit together, I wanted to keep going but I understood I had already modeled out a lot of texture/uv time. So I stopped here and moved on.
Week 2:
I uv'ed and started texturing, reusing textures where possible and constantly changing the uv's to match the reused textures.
Week 3:
Moving to the top I still felt that most of this area was a little bare as far as modeling was concerned, but couldn't go back to modeling until everything else was completed. I never found time for that though.
Week 4:
The final week, and I began experimenting with the new UDK landscape system, and that's when a bug hit my files. Two days before final turn-in my landscape disappeared, never to return. No matter how many times I rebuilt the landscape it would disappear as soon as I started messing with lights. So I had to rebuild the file all over again, this time using the older terrain system but taking advantage of the new foliage system for placement of the rocks. The final problem I ran into is that my computer was unable to use lightmass, I guess the new udk's are just too heavy for my mbp .. so I spent a lot of time trying to fake the look lightmass gave my earlier works. These are the shots I submitted and the video I was able to throw together .. apparently Epic changed the way rendering videos from UDK works, and I lost a lot of time trying to find how to do that again. If not for a friend on Facebook I'd of never figured it out that night.
If the above video doesn't work, here's a youtube link [click here]
We were required to leave a story for the environment piece, so here is what I came up with:
Story:
The year is 2010 and through much protest from the world leaders, the UN had decided a human extinction scenario should be set into motion in case any of the old civilizations' histories/prophecies were accurately translated for the end of this earth era in 2012. Whatever the plan was, it had to save people from giant asteroids plummeting into the earth, planetary alignment/magnetic polar flip, huge solar flare storms attacking the earth while we're at the earth's currently low state of atmospheric protection [there's a lot of holes in our atmosphere atm], or the return of the Anunnaki[alien visitors] to rule as gods over the species they may or may not have created in their image .. or all of the above. Billions were spent on research and development for a flexible technology that would protect at least a handful of humans from all of the scenarios presented to the UN, and finally they came upon a plan designed during the cold war era that had been started but never finished. They decided to build a series of underwater/underground bases in which to house the most important things and the most genetically healthy people from across the world. And so the Regenesis-2 was born as one of these installations across the world; much like the international space station, every country that wanted to save it's people had a part to play in these life saving arks.
It took two years before the Regenesis-2 was fully constructed from it's already half built frame in the middle of the Pacific Ocean, and with only a month left before December 2012 mobilization had already begun while the construction workers were finishing off the last of the protective measures in the building. Supplies, however, were delayed, as some of the other installations which had been finished slightly earlier had needed to be stocked first. A human ark at the bottom of the ocean stretching down into the earth's crust filled with personnel and no food, what could go wrong?
The supplies never came. Contact with the outside world stopped shortly after the last survivor arrived, as a result of the overactive solar flares from the sun, so nobody knew the north pole had turned into the south pole and vice-versa. Nobody knew this had caused hyperactivity in volcanoes all over the globe, and that the sky was covered in ash. Nobody knew about the Apophis Asteroid hurtling towards the earth at 10,000 miles per hour with a projected impact somewhere around the middle of the Pacific Ocean, or that the gasses emitted by the giant rock after its impact would turn any human survivors into zombie-like creatures. For now all you know is that life sucks at the bottom of the ocean with no food supplies from the surface, and the microbial food generators wouldn't create enough food for everyone to have a full meal for another month.
It's been a while since I last posted so I figured I'd update this with the new things I've completed .. more's undone than done. ;)
Arena Net posted an open intern competition for environment and character artists, so I took up the test and tried my best at it. In the end, as always, I'm not extremely happy with the way it turned out, but I am happy that it looks presentable.
The rules: create the building with less than 3000 polygons [I understood this as quads and hope I made the right guess], and a maximum equivalent of 2x1024x1024 with any kind of texture map. Here's the building they gave us to model.
It took me 1.5 days to model, 3 days to UV and texture, another day to add my theme integration pieces as well as make it all work in UDK, and another day to capture a video of it and run it through Final Cut Pro to have it sort of sell a mood as part of the theme.
modeled
first uv attempt
textured with finalized uv's
texture touch-up's for stuff like cracks and dirt
a little bit of theme/mood
from the front in UDK with particles
from the left in UDK with particles
from the right in UDK with particles
from the back in UDK with particles
up close inside the glass dome to show I wasn't hiding my textures
my 1024x1024 diffuse had heavily overlapping and reversed uv's
In the end I couldn't submit the UDK files to Arena Net and feel a little handicapped as a result of that, because they specifically stated wanting to see my texture maps. Hopefully they'll understand and/or will find a way for me to send them the UDK files. Either way, I'm glad to have worked on this and was heavily challenged to make the diffuse for an entire building on a single 1024 .. which is something we never did at Full Sail.
The final month for our game project and we have a lot of things that still need to happen before we're happy with our game. Every time we turned around there was a new game threatening bug to fix, or some art being rendered improperly. But that's what it's all about, succeeding through great difficulty.
For this month I begged to make another level, and though at first the answer from our art lead was "no", he eventually noted that I finished with all the other tasks in order to start the new level. So it was that level 2 was born. But first things first: I finished the HUD redesign and polish.
Then there were minor tweaks, like who killed you and who you killed message pop-ups, health dots instead of health bars, screen realignments that we'd never noticed before, the new modulaser, trophies, and radar size/visibility adjustments.
Once I was given the go-ahead, I started my block out of the environment. I had already decided I wanted to do a small single level environment for maximum carnage, and yet something with ramps and jumping to help the environment feel larger than it really was. I had been playing with the idea of using the type of arena featured in "Twisted Metal 2"'s "Suicide Slide" level, but changing it to fit our needs and theme. I blocked it out and made the changes our art lead requested, and then blocked out the collision mesh before turning it over to the art lead for a.i. waypoint placement, lighting, and everything. In the end we came out with a second level using 90% of the assets from level 1, and I was happy with the way our ideas all came together.
The view from the level selection screen in the game.
The view of the level from the outer edge of the arena.
This view shows some of the ceiling and the lighting of the center of the arena.
So that was the month pretty much, I did some work on my project critiques for next month. Overall though I took it easy at home and tried not to kill myself with work for once. Here's a video of some of the game play of our game.
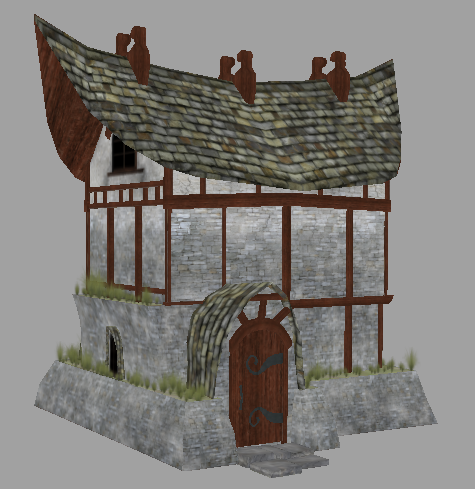
GCA was shared with the game project, and since we only had this month for the project it kind of took front seat to the game. Step one was to get the reference approved, I found these odd/cool buildings over in San Zhi, Taiwan. I don't know the whole story, but apparently they're from the 1970's and never got completed. Here's a few shots:
With reference in hand, I blocked out one of the buildings in maya. I also made one of the larger structures in the yard, but as time got down to the line I ended up realizing I would fail if I couldn't focus on just this one piece and a decent yard to put it in.
Then I blocked out some base textures. I upgraded the diffuse textures, then built spec and normal maps. Then the big test: does it look good in UDK? It didn't look horrible, but it needed a lot of work. So I went back to the drawing board with only 1 week left to turn it all in. UFO homes, now with non-bsp windows! :p Got rid of the plane and added in some terrain. The next critique was to add some mid-ground environment, and I also added in the skybox. I started playing with light function shadows for the clouds. After the final critique we had 4 hours to make all of our changes and turn it in. Some of the things I changed was: the depth of field, amount of fog, harshness of cloud shadows/speed, softening of shadows with the skybox light, and I had a brief moment to think about changing the sand out to dirt .. but couldn't find a good enough photo to manipulate to a repeating/tiling texture. Here are the final three shots:
This month was shared with Game Cinematic Assets, so our planning ahead really paid off. All the extra art we made was finally implemented into the game with the code, all we had to do all month was clean-up and touch-up to fit with the code. Here's some of the updates and changes:
Fender Bender has new game modes in place and we needed a keep away item, since we already had nuts and bolts planned for the smash n' grab mode I thought that combining the two into a mega golden bolt-nut would allow the players to know it's important without having to put too much thought into what was going on. The bolts on this item are the same as the other bolt pickups below, but the nut itself was "up-res'ed" since this is a single focal point of the game. With the shield code in place, I scaled the shield to match each vehicle individually. Later on we ended up opting out for less of a bubble shape and more of a round sphere shape. Since I didn't make the new shield I don't have that file to show off.
Smash n' Grab game play mode allows other players to gain points by collecting nuts and bolts from vehicles that they attack. These items fly off the vehicle as the vehicle is takes damage. As per the description, there's quite a few of these that fly through the level and needed to be kept fairly low poly. The old ice cube didn't allow for the modulauncher to still attack nearby enemies, so I redesigned the ice cube a little bit.
Then I scaled the new ice cube over each character's vehicle to make sure it left enough visible for players to recognize the vehicle at a glance and still realize that they were completely surrounded by this pack of ice.The shield was done, but we'd forgotten completely about what the pickup should even look like! So I went to work at figuring out what it should be. In the end I decided a shield silhouette would work as long as the shield itself looked like tech. that might fit with the modulauncher.
Here's a short video of combined game play of our beta turn in: