03 January 2026

BMO H4


Having physical media is one of the peak retro gaming experiences. Seeing your game boxes on the shelf and being able to look through game manuals with all of the fun art those have on them was a big part of the gaming experience that sadly no longer exists. Similarly the game disc or game cartridge being slotted into the console is almost completely gone now in the age of the downloadable games with no boxes and no manuals.

The last console models I made I felt that lacking and wanted to make something that was designed around having a cartridge experience, and after watching some Adventure Time I realized what I needed to do. 


 Once the concept was finalized with rough measurements of the hardware I'd be using in the build I started modelling and came up with this


Cleaned up and set up in the slicer


Printed and assembled, hello BMO!


And finally, functioning


I've shared my build of the model on:

Maker World:
https://makerworld.com/en/models/2187545-bmo-h4?from=search#profileId-2374842

Thingiverse
https://www.thingiverse.com/thing:7258734


16 August 2025

Nuka Cola Quantum

 Nuka Cola Quantum

Bambu Labs was having a fun build contest on Maker World to push their translucent and glow filaments, and as a fan of Fallout I instantly knew I wanted to participate.

Here's what I ended up with LED powered on:

LED powered off:


I've shared my build of the model on:

Thingiverse:
https://www.thingiverse.com/thing:7119505

Maker World:
https://makerworld.com/en/models/1703771-nuka-cola-quantum#profileId-1807037


21 June 2025

Droid Cast H4

 Droid Cast H4

I learned a lot between the previous PC cases and decided to try to make one less boxy that still took advantage of the Odroid H4's power


This sort of Dreamcast inspired case was a lot of fun and got a lot of practice in sculpting which I haven't really done in several years. With the case finished I loaded it up with the PC


I even made a print for people who might be a fan of the Japanese Hello Kitty translucent pink version of the Dreamcast 


I found a user on ebay by the name retrostevo who made really great replacement OEM style stickers for the aging consoles, and since my version is very similarly scaled I was able to place them to add a touch of flare and faux authenticity to the top of the otherwise nondescript case lid.

I've shared my build of the model on:

Thingiverse:
https://www.thingiverse.com/thing:7073023

Maker World:
https://makerworld.com/en/models/1539750-droid-cast-h4#profileId-1615791


16 February 2025

X-Cube

 X-Cube


I found I disliked how the Pi 5 performed a majority of the time and it didn't deliver the feeling of the price tag associated with gathering and assembling all of the parts to make it, So I set out to design a device that would deliver that feeling. The X-Cube was my attempt at that, the power plant is the Odroid-H4 base model which was much more powerful than the pi 5.


I used matte black [charcoal] for the body, and pla basic bambu green and white for the small jewel part.


After much tinkering I turned a plastic case into a computer console


I've shared my build of the model on:

Thingiverse:
https://www.thingiverse.com/thing:6952581

Maker World:
https://makerworld.com/en/models/1116136-x-cube#profileId-1113648


26 January 2025

Pi Cube 5

I was excited for the release of the Raspberry Pi 5, but when it finally arrived and no one released a retro themed case for the tiny computer I knew I had to make something myself. Before I could do that I found a video on YouTube from Palacio Gamer who was showing off a model he had made for his Orange Pi 5. He had freely uploaded his model so I downloaded that and cleaned and cut it up into something that fits and works for a Raspberry Pi 5.


Then I turned it into a console.


I've shared my remix of the original model on:

Thingiverse:
https://www.thingiverse.com/thing:6722715/comments

Maker World:
https://makerworld.com/en/models/750008#profileId-806276


31 December 2017

All Outta Steam

It's the end of another year and as I look over my blog I find I never told the world about some of the things I'm willing to talk about. So here's to that:

I had continued development of Steam VR controller mods with the next Megaman buster:

The X-Buster


    X - Buster
    by jason.n.hutchins
    on Sketchfab


Since that one was basically just a re-skin I really wanted to try my hand at a more advanced model:

The TruForce Buster


    TruForce Buster
    by jason.n.hutchins
    on Sketchfab


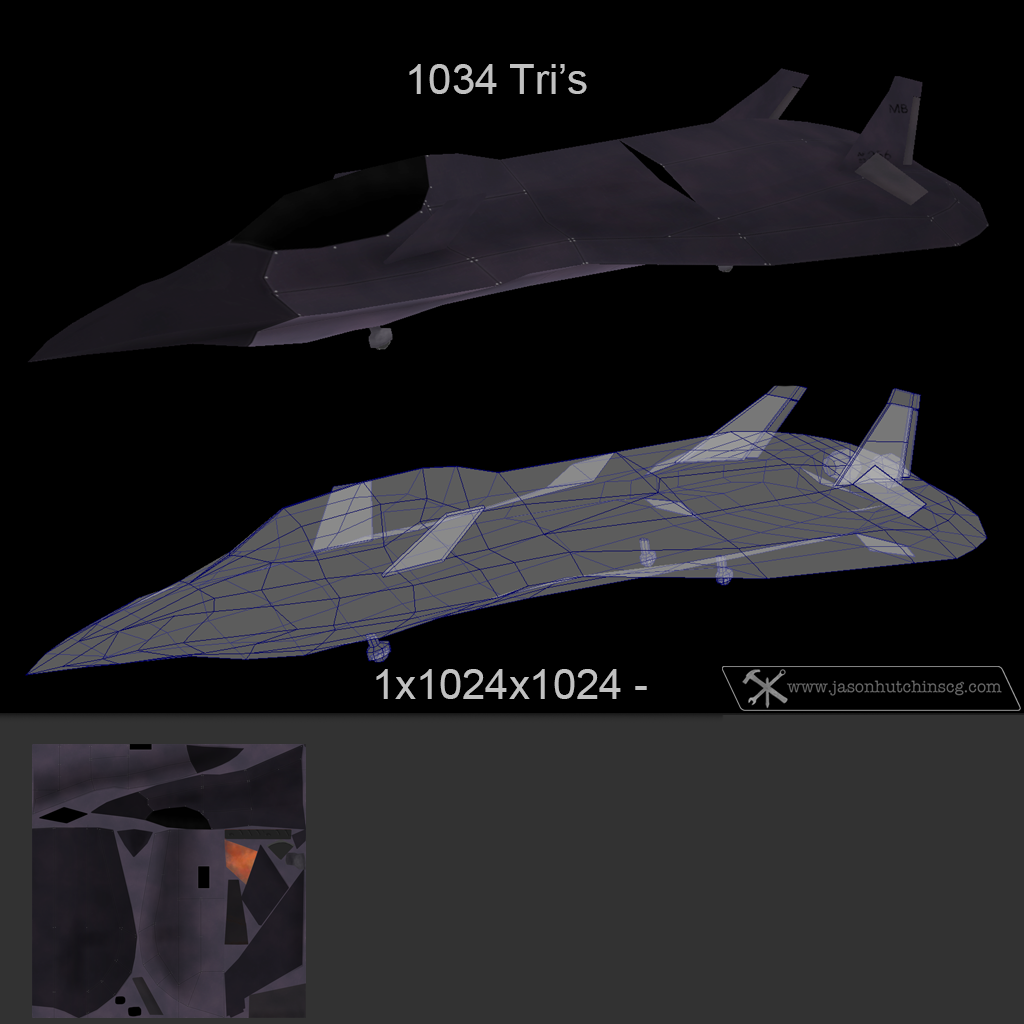
Lastly I made small progress on a medium model:

Low Tech Medium Plane


This year has been crazy. I'm still doing the damn thing and holding the seams together by a thread, I only hope I've made all the right decisions along the way and that I can continue to make the right decisions to keep moving forward and follow the dream. After all, "Everybody gotta have a dream." :)

08 August 2016

Life After VR

I was approached by a coworker a little over a month ago to begin the process of figuring out swapping the skin of the HTC Vive's controller during menu operations. I don't actually own one but understood the excitement he had on his face while describing other mods people are currently playing with on the Steam VR.

Work began by digging through the original files used by the Vive as well as other members files. Eventually we came upon an agreement for how to proceed and I kicked out the first test, apparently there are no dynamic lights in the menus so the model showed up as a big blob of color .. since all I had created was a base model with a base texture just to see if it would show up. At least it showed up! [note: all screen shots are from maya]


After that I painted in some basic lighting, I wasn't sure if this would help any but was surprised to find out it showed up perfectly .. but that highlighted other issues with the shape of the model.


I then corrected the shape and added a few features.

                                            
The more I dug the more I found, the vive material has a specular map .. which doesn't make sense if there's no dynamic lighting. I decided to try a specular map anyways for the next test.

After that test we found out the specular map is indeed not used in the menu, because as we observed there is no light, which means the specular map on the vive controller model must be used for some other program and not for the menu specifically. So I uploaded the previous model without any lighting, after fixing the lines on the inside of the blaster area and pushing the lens back so it appears to be deeper inside of the gun and let my coworker with the original idea upload it from his account to Steam VR and link me as a contributor.

https://steamcommunity.com/sharedfiles/filedetails/?id=739677353

If you end up using it feel free to let me know how you like it!


13Jan2017 - Edit:  I just realized I never uploaded a link to the final model on Sketchfab so here it is:


    Mega Buster
    by jason.n.hutchins
    on Sketchfab


29 February 2016

Udemy


I found this little online video resource called Udemy, I spent $10 and signed up for access to this "class" called "Learn the 'hand-painted' texturing style for video games" from 3dmotive LLC. I figured it would be nice to get into something small and get a refresher course while seeing how someone else makes hand painted style textures.

The class covers a sword and a shield, I spent time on the sword and simply watched the rest of the videos for the shield before calling it quits. I already feel bad for abandoning the low tech medium plane! So after about 10 hours this is the model and texture I came up with:


612 triangles and one 512x512 texture


I really should have pushed myself to do up the shield and make the sword only take up half of the texture space but I was happy enough with how it looks to feel like I learned something and not look at the sword as a complete waste of time.

On to other things!!

12 September 2015

A Quick Update on Slow Progress

I've spent the last few weekends mixing together more ancient aircraft to make combat vehicles for my teams, this time the red team will have pieced together the main body and wings of a WW1 German AEG G4, and the jet engines of a WW2 German Horten Ho 229. Looking back I tend to use a lot of older German designs to influence my own and I think it's just because they were really good at building interesting shapes and really pushing the design limits to get new properties in their planes.
With all that said, here's a silhouette test I threw together:


I so far have UV'ed the checkers texture onto the plane and then duplicated the body pieces over, but I think I'm ready to start rocking a rusty red paint job on there for the low tech's to head into battle.

Stay tuned and I'll have that up before too long.

19 July 2015

High Tech Medium Plane


You may have noticed I skipped a bit of time again, this time my excuse is that I was building a sculpey maquette. I may or may not show that on this blog at some point, so for now just be happy with a new update from the game project!

I managed to build the High Tech team's medium rocket:


There's the traditional model/texture view you've grown accustomed to from my blog, but here is a viewer from Sketchfab for the 3D render view.


I realized, before I uploaded this model to Sketchfab, I hadn't ever uploaded the previous vehicles for anyone to view in 3D on Sketchfab. So I took care of that as well as you can see below:


Thanks for viewing, and as always stay tuned for more updates!


05 April 2015

Brain Power

I ended up working this one a couple times, like I mentioned earlier, but I think I finally found the form I wanted. This rocket is half the height of the other rockets, but 10 times as smart .. with brain power of course. That's how it works right? Adding a brain to anything will make it smarter?


    Smart Rocket
    by jason.n.hutchins
    on Sketchfab


Hopefully the new Sketchfab 3d previewer will work out for this blog, but just in case I'm still going to be uploading the old 2d shots of the items.

This should be the last of the rocket weapons, now back to the vehicles! I have a bunch of sketches from the previous years I wasn't able to spend a lot of time on this so I'll still be working through those to see what I can make work. The next items should be the medium fighters for both low and high tech teams.

Stay tuned!

edit [12apr2015]: I started back up on the vehicles, this time on the medium high tech and have included a silhouette test of the block-out below.


06 March 2015

Heavy Bandwidth Page

It might take several moments before the seven render windows fully load in your browser.

I've been working on a smart rocket and have run into the part where the 2D sketches didn't really work in 3D so I'm still experimenting with what shape and design I want for this weapon. In the meantime, for an update, I found this really neat site to share my work in 3D as it's meant to be viewed .. and not as a render on a 2D panel. So here are my current rocket models as viewable from the sketchfab.com site. Also I apologize for the page being so heavy due to all the models being on one page at the same time.  In other news: Unity 5 and Unreal Engine 4 just released as free downloads with what I'm sure is a lot of fine print when you decide to charge for your games, I decided to go with the marketing strategy for Unity since it's more of a straightforward pricing package and not a percentage based on what month it is, how much I sold, and when .. which is how the Unreal Engine has been packaged.


22 February 2015

Ricochet Rocket

This one I did a few extra sketches on so the build went rather quickly, the idea is that the rocket will hit the enemy and have a small explosion which will release the two naval mines attached to it to bounce out and explode with whatever it hits. So I guess this weapon would be best used for attacking a stationary target like a base or something.


I added a chalk-like sketch on the side of the mines as decoration, I've seen a lot of people do that in the military. They'll draw on the bombs intended for their enemies with their enemies names on it. So this is a little nod to that environment.

The next rocket is supposed to be the final one for this game, and it should be smarter than the rest of them. Then after that one I can get back to creating the rest of the vehicles to flesh out the "character classes".

Thanks for looking and stay tuned!

01 February 2015

Tesla Rocket

It's a new year, but I'm still working on the same game. For this build I wanted to make a weapon that would electrify the vehicles it impacted, after digging around for a while I decided the coolest way to do that would be a plasma ball that would electrically explode when it hits its targets. So I present the Tesla Rocket:


I really like the silhouette of the rocket and the arched metal around the glass dome, but wasn't too happy with the way the plasma ball cards came out. I guess it'll do though. This should leave two more weapons to build before I can continue to work on vehicles and environments again.


Thanks for looking at my work, and stay tuned for more updates. :)

Edit:
Here's the block-out sneak peek for the next rocket:


It's sitting at just over 800 triangles which isn't too bad considering all of the small details on this one, we'll see how it turns out once I start in on the uv's and texture.


14 December 2014

Raining Doom Upon Our Doomed Enemies!

It's been a while, but with me spending my work days in Presagis Creator I hardly feel like working in low poly 3d in Maya when I come home. So between working on the car, house chores, and simply trying to relax, I've been sneaking a few hours here and there on sunday mornings having fun with my rocket punk themed game I've been dreaming about for some time.

Since the point of a new post is to show new work, I present to you Remote Rocket .. or RC Rocket .. still not sure.


The point of the rocket is to be much larger than the others and to only be able to carry one at a time, once fired the players camera will ideally follow the rocket as the player will be able to control the rocket to remotely rain down some doom upon his doomed enemies. Once fired the wings and extra thruster will extend from the main housing allowing for extra control and distance while still keeping a large area of the main housing for explosives. The metal loops on the top are where the rocket would be held under the vehicle just before it was launched .. I want this item to be so big other players can see it and try to attack the player before it can be launched.

The next weapon will be a little more electrically themed, the concepts are pretty much nailed down I just have to start blocking it out and seeing how it turns out in the 3d space. But I'm sure it'll be next year before I post that one.

[edit] - I found some time to start blocking out the concept based on my drawings and some random google searches. The body will be similar to the fire/lava rocket in that it's mostly glass, but this one will have a gold/brass colored metal braces along the sides to add some support and rocket punk style. The hardest part I think will be getting the look of the plasma ball in the middle, but that's how you learn right? :)


As always: thanks for looking in on me, and do stay tuned!

15 July 2014

What's In the Box?

The next item for the internship, and thus with permission my blog, is this jewelry box. This item was modeled by one of the other artists, while the uv's and textures were my own creation with a touch of slight retopology.


The theme for this object is an heirloom type of jewelry box that was passed down a few generations, and that may have survived the elements for more than a few years before being recovered. I treated the lid as the focal point of this object, though I doubt in the actual video anyone will ever see it I'm still very proud of the way it turned out.

I used six different wood textures to get the look I wanted in the diffuse texture, while the metal is only two with a lot of help from 3 other textures in the specular channel. The design on the lid was partially designed with the character's name in mind as well as something simple and elegant. The text is Lucida Calligraphy font faded out with grunge brushes to look like faded paint. The same fade was used on the wavy lines on the sides of the box with the faded red coloring to add a bit of breakup without being too distracting from the lid.

Possibly more to come, stay tuned!


[Edited 10sep2014 to show the textures and wireframe]

06 June 2014

This Little Piggy ....

Normally for my internship I can't post what I've been working on because it would tell too much of the story, and we're just not ready to talk about that yet. This month, however, I was able to finish up this little guy and as he doesn't really have much to do with anything I was told I could post him online. So here he is: the vampire piggy ... bank!

He was a bit of a team effort: one of the other artists modeled the base mesh, I took it and ran with it from there. I modified the shape of the mesh, created the legs, changed out the ears, uv'ed and then textured him, I also received a lot of critiques for cuteness/theme from the other artists on the team.

I've only posted his diffuse texture, but he also has a slight specular map. As it's animation the rest will be handled in render. I just figured he was too cute to keep quiet and is a big change from a lot of the other stuff I've been posting.

I was originally going for a cutesy plush pig that might feel like he might actually try to suck your blood at any moment, but the rest of the team felt like it looked like a ceramic pig that was painted to look like a plush pig. Either one is fine, it's just interesting to see how different your work is interpreted at times. :)

Thanks for watching!

[edited 10sep2014 to show the textures and wireframe]

13 April 2014

Chainsaw Rocket!

This past month has been another light month on my internship, I've touched up a few things and did file maintenance on the server, so I took full advantage of my nights as well as the extra hours I've had to work at my day job filling in for my personnel taking vacation time off during nights and weekends and I'm stuck covering it. I present to you my version of the chainsaw rocket:


I seem to have a love affair with using Stihl branded tools for reference images, as I also used them for reference during the Fender Bender game "healing item" pickup [duct tape and wrench], so I decided this time to keep the color scheme used on their chainsaws so that it didn't look too extremely unrealistic. I also decided to change the chainsaw teeth to something a little more cartoony/unrealistic to match the overall theme of the game. I decided to leave out the original concept art I had sketched out because of the overall quality of it was much lower than my normal sketches. If anything comes up I'll include it separately, but for now I'd rather simply leave it off the blog page.

Thanks for staying tuned and I'll update you when I finish the next piece!

26 February 2014

When the Fat Man Sings

I had a bit of extra time due to my work schedule and filling in for people, and I realized I had never updated my finished power rocket. So here it is:


I modeled and textured the Mark 3 "Fat Man" bomb after photos I'd found online, and then exaggerated it to fit in with the theme of the rocket booster on the bottom. This "heavy" rocket will be the slow non-maneuverable, but extremely power one hit wonder of any pilot's arsenal.

Here's a preview of what I'm currently working on:


I've turned in a large chunk of textures/uv'ed models for my internship, so I'm awaiting further review before moving on to the next area .. and got busy with something else that doesn't make any sense.